- Joined
- 27 December 2005
- Messages
- 16,456
- Reaction score
- 19,163


*Pretty* sure he'd bond the paint flakes back down to the wood. Likely softening the paint thermally or chemically, but the point would be to retain as much of the original as possible.Funnily enough I was thinking 'what would Baumgartner do?' when I looked at the flaky paint!
I think gentle use of scalpel, hypodermic and conservation-grade adhesive would be the way to go. I'd worry that heat would warp the wooden parts.*Pretty* sure he'd bond the paint flakes back down to the wood. Likely softening the paint thermally or chemically, but the point would be to retain as much of the original as possible.
Should we place bets on whether the bare wood is appealing enough that it gets left that way?I am kind of anxious to see the bare wood anyway.
I guess it's worth a bet! It'll be nice to get some pictures of it in the raw.Should we place bets on whether the bare wood is appealing enough that it gets left that way?
You might try simply peeling it off. Obviously a fair bit is barely hanging on; some of the rest might come off with tape.I guess it's worth a bet! It'll be nice to get some pictures of it in the raw.
A light shell based blast or hand sand?
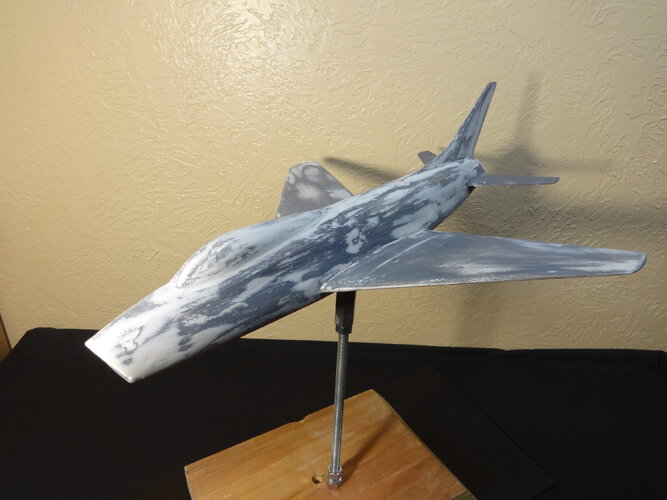
Yes. The intended lifespan of these things was likely less than a year, long enough to win the contract. After that, the suits didn't care. The wood *should* have been completely dried before being used; sometimes it wasn't. And sometimes the dry wood ended up exposed to humidity or outright water.Were these early manufacturer wood models subject to cracking like this? I guess wood breathes long after its milled.
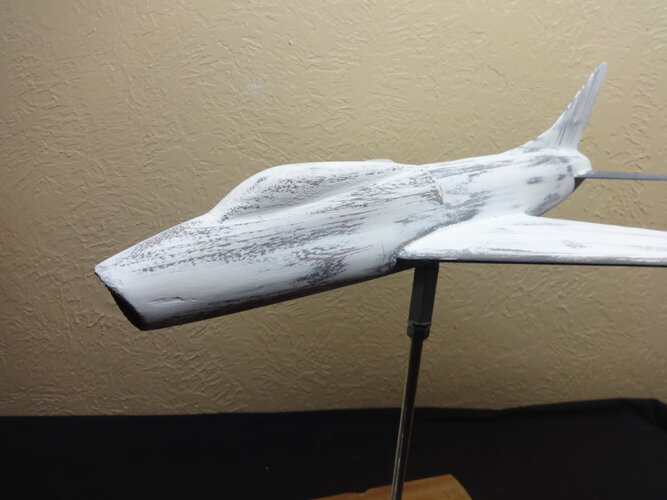
Yeah - no point in "maintaining" a dilapidated artifact in a distressed condition. What value whatsoever is there in preserving wear and tear?I think stripping it down/refinish is the way to go. Lots of work and $ otherwise. I am kind of anxious to see the bare wood anyway.


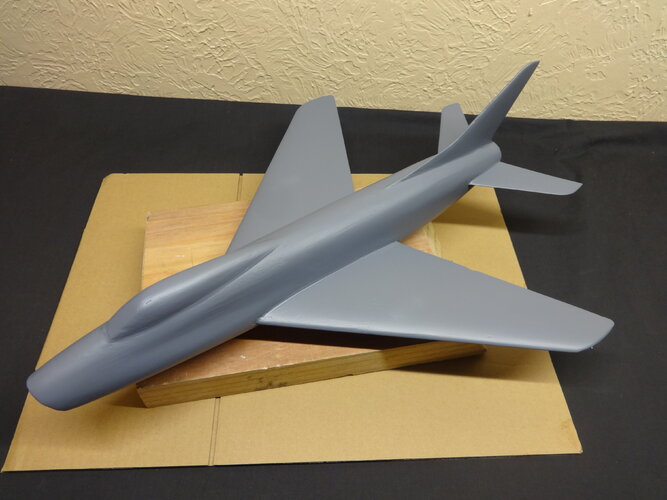
That's a *rough* surface. A result of the blasting?I had it glass bead blasted today.
Oh man I have been traveling and missed this... I would have clear coated the areas that were lifting or used a thin glue..... and then masked the good areas, primed and filled, and then spent a tone of time trying to match the paint.... which is not impossible, but time consuming.
Apparently that stunt *increased* the value of the artwork. I guess it makes sense, as that was the work *of* the artist, as the intended outcome. Some other random yahoo come along with a boxcutter and slashed it to ribbons, the value would have been decreased. Slashed, if you will.That reminds me of the Banksy painting that sold at auction and shredded itself a few years ago!
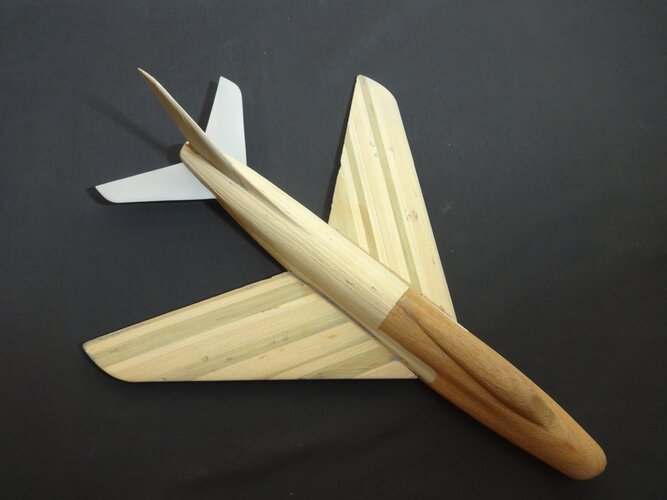
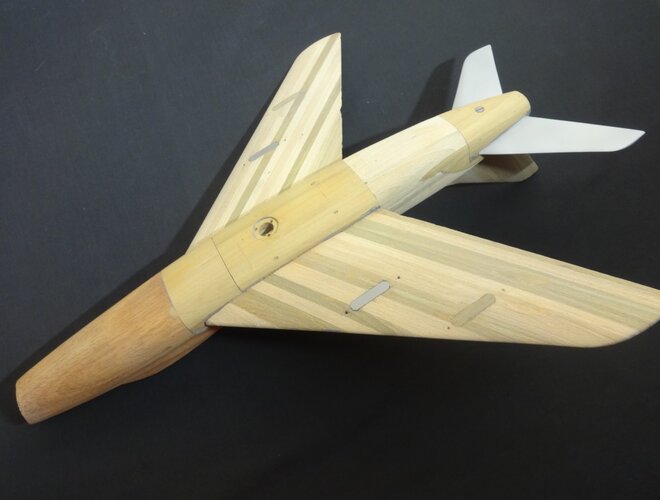
Fascinating to see the construction method.Interesting mix of wood and notice the starboard wing wood laminates are parallel with the tailing edge, while the port wing is parallel with the leading edge. Also found additional wood plugged cuts (for magnets) of outboard underwing stores.
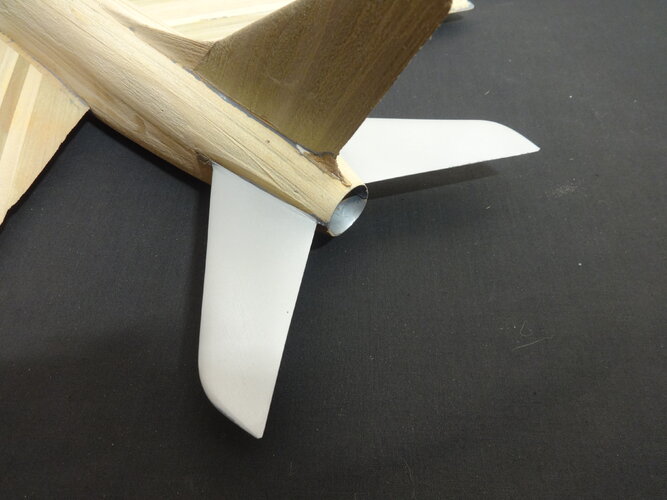
The last surprise was the horizontal tail plane, it's solid aluminum.
Nicely done! Interesting comments about what it might be made from.
You need to fill in the discontinuities specifically, not rely purely on the primer. Then sand those down and prime over that. This thing should be baby-ass smooth before the paint goes on with no surface blemishes visible.Still needs a few more fill/sand/prime coats before painting.
In Merriman's videos you will find many solutions... And maybe he can help with some sage professional advice.Still needs a few more fill/sand/prime coats before painting. I need a source for nice large scale USAF decals. Stars and bars 2-3/8" long, USAF are 4" long.
Any ideas? Thanks.
Let it take its time. While it takes days to cure, you can use that time to watch Star Trek: TOS or Star Trek: TNG or Star Trek: DS9 or avoid watching Star Trek Discovery.It's a time-consuming process for sure
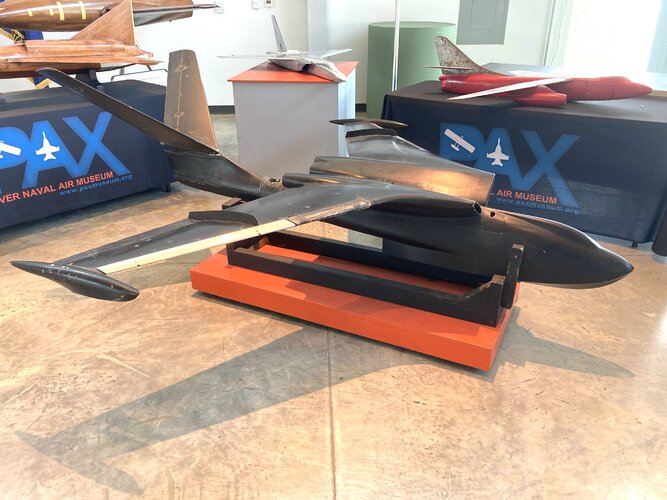
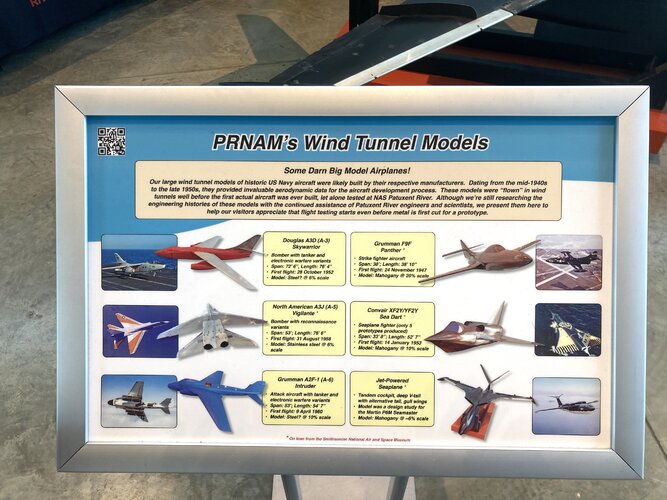
Wood wind tunnel models are usually made of *hard* woods. This model looks soft.It "may" be a wind tunnel test object. I've attached some photos of the wood models at the Pax River Museum that were indeed wood wind tunnel models.