Saab J-27 Prototype 1:72 scratch

Wurst

ACCESS: Restricted
Joined
19 September 2019
Messages
30
Reaction score
152
Hello everyone and welcome to my first construction report in this round!

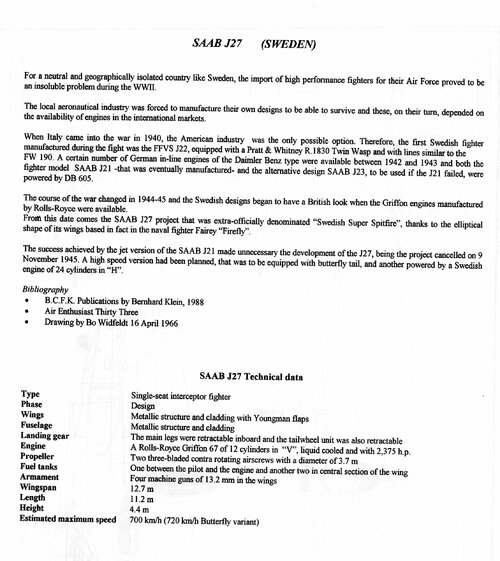
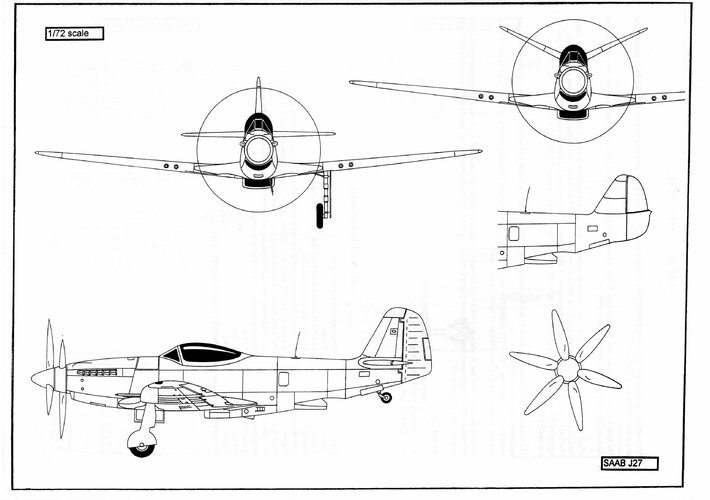
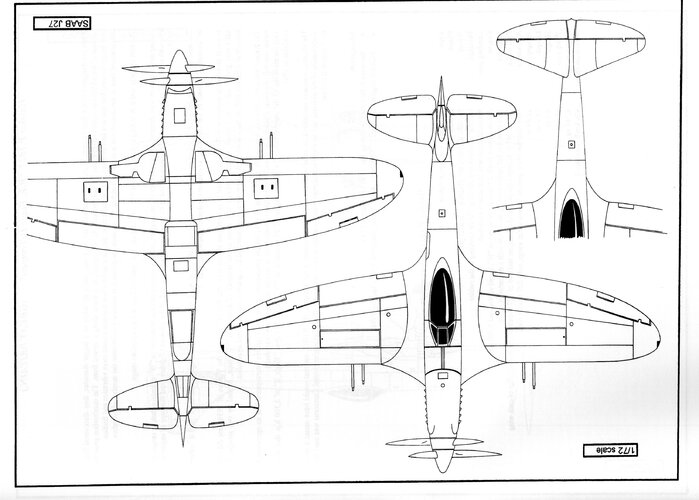
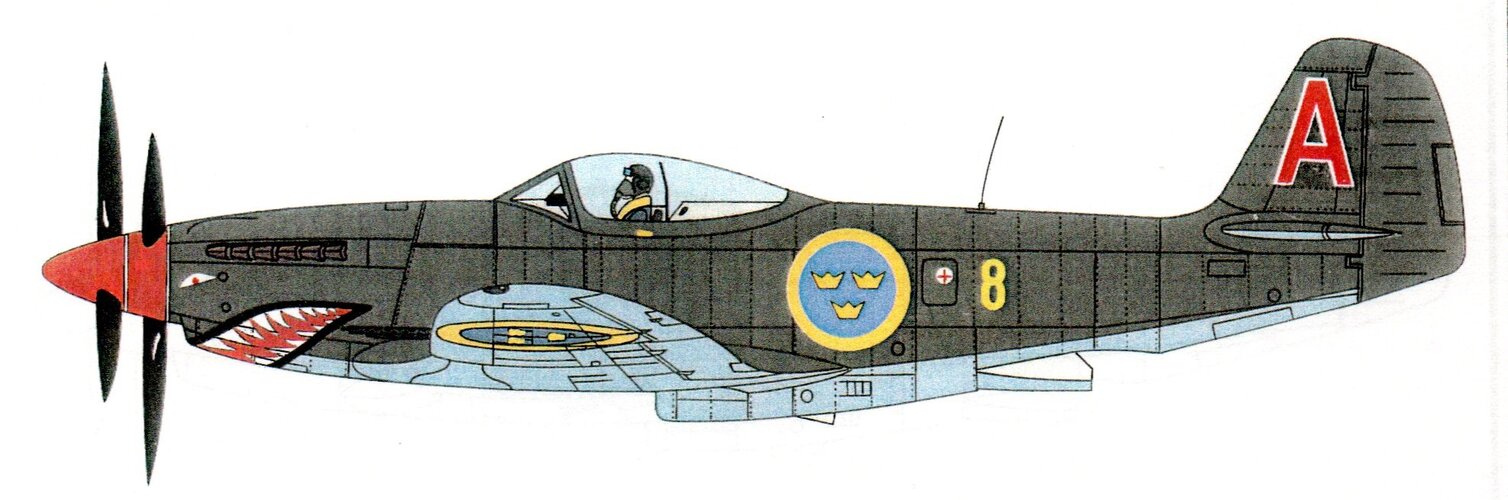
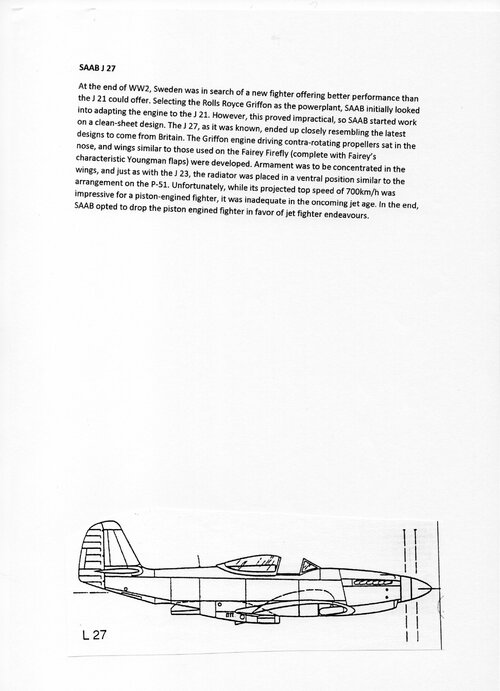
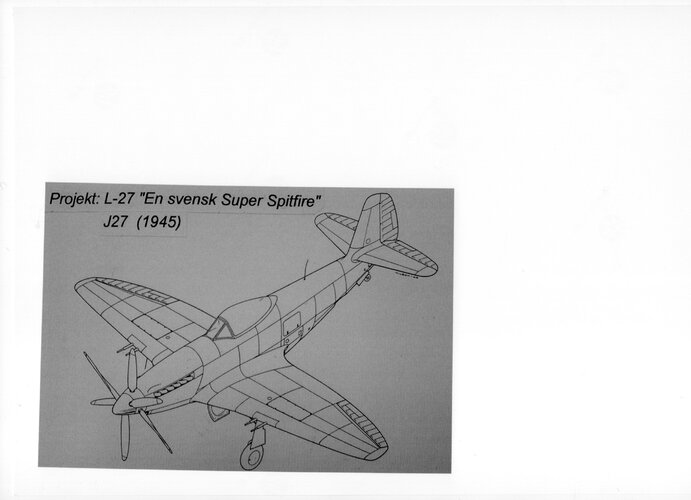
Saab was working on a high-performance fighter at the end of World War II. The aim was to exceed the performance of the Saab J-21. Initially the idea was to install the RR Griffon engine in a J-21 - but it didn't work out. So the aircraft was completely rethought and (on paper only) a mixture of Spitfire and Mustang was created. The Griffon engine was intended to drive counter-rotating propellers. Since the jet age had dawned, there wasn't even a prototype.

So that everyone knows what it's about:

https://www.secretprojects.co.uk/threads/swedish-project-saab-l27.3400/
Chic, isn't it?
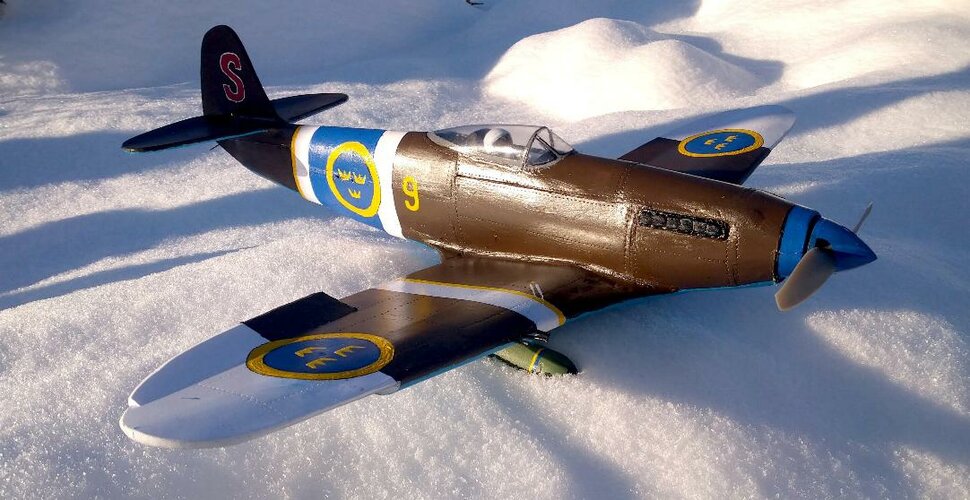
As written in the title, this construction site is a full scratch because unfortunately there is no kit.....

When looking for suitable parts to build the Saab L27/J27, I found out that the wings of the P47 and tail parts fit well with a few changes. The wings of the Hawker Tempest also fit from the outline, but have a gull wing. Even the control surfaces (of the P47 wings) are laid out similarly.

k-IMG_0586.JPG

The outer wings are almost identical to those of the Thunderbolt, as is the horizontal stabilizer. For me, the Rolls-Royce Griffon with the counter-rotating propellers is the only parallel to the late Spitfire. The plane will be a little bigger than a P 47. It's unbelievable how well the P-47 surfaces fit. The hull comes from a Boulton Paul Defiant, the engine and propeller will come from a Supermarine Seafang. I sawed the air inlet on the lower fuselage from an NA P-51 A, re-drawn the canopy from a modified P-51 D, scratched the landing gear putty and plastic card do the rest.,. It is going to be a party!
 
Last edited:
I work strictly according to drawings. My approach is to first adjust half of the wings to the contour. The other half is then added. One half of the fuselage is first assembled from various parts. When all parts are aligned on the drawing and glued together, the other half of the fuselage is built in the same way. At the end the halves are joined together and the fuselage is finished. That's the plan...
Needless to say, a lot of filling and sanding needs to be done.
 
You have read my mind Wurst! ;)

In Tony Buttler's latest book, Propeller Twilight, there is a reference to the J-27 as it was to be powered by a Griffon engine,
Your detective work in finding the right pieces to build a J-27 is outstanding.
 

Attachments

  • Prop-Twilight.jpg
    Prop-Twilight.jpg
    33.8 KB · Views: 73
We'll see if I've researched well.
By the way, I ordered the book about the late English fighters. There are still a few projects waiting.
 
We'll see if I've researched well.
By the way, I ordered the book about the late English fighters. There are still a few projects waiting.
The book only has 2 pages on the J-27. SPF has a much better collection of documents and images.

Tony did a great job on finding never seen before photos (at least for me).
And there is lots of information on contra-rotating propeller designs which is of interest to me.
 
For now I have enough drawings to build the Saab j-27 thanks:). Justo Miranda's book was also very helpful. I'm excited to see what the J-27 looks like in three dimensions. I didn't order Tony Buttler's book because of the J-27. I am interested in many things.Can't wait to get the book. Some powerfull english prototypes will follow:)
 
Today I took care of the rest of the fuselage. It still looks very rough, but it will work.
I took the engine and cockpit area from the Supermarine Seafang. Some of the dent above the exhaust disappears under filler. The Saab J-27 was a little bulkier at the front. The exhaust will move forward a bit so that it fits exactly into the drawing. The cockpit had to be moved forward a bit for the same reason.
k-IMG_0670.JPG

The black parts come from the Defiant:
k-IMG_0672.JPG

k-IMG_0671.JPG

Next comes the interior work.
 
Thanks!
The interior work is completed and the fuselage halves are together. I adopted the cockpit of the Seafang and just used a different seat and control stick - looked more Swedish...
k-IMG_0676.JPG

Some pipes for the same reason:
k-IMG_0674.JPG

According to the AZ Model building instructions, the counter-rotating propellers should be glued together. Of course I couldn't do that. The shaft for the first propeller is a 1.2mm injection needle, for the second propeller a 0.9mm needle fit perfectly.

k-IMG_0680.JPG

k-IMG_0679.JPG

k-IMG_0678.JPG

Tonight it's time for the wings. I don't know exactly how to install the wheel well yet.
 
Last edited:
The top half of the wings is finished. The tips needed little sanding.
k-IMG_0683.JPG

A strip of 2-3mm had to be cut out of the wings and it would fit the drawing exactly. For comparison, an unchanged P-47 wing from Revell is shown in the picture:

k-IMG_0684.JPG

k-IMG_0685.JPG

The bottom half is partially finished. I decided on the 2 x 20mm cannons and changed the cartridge case ejection accordingly. I don't have an idea for the wheel well yet.


The fuselage is finished, only small repairs are missing.

k-IMG_0687.JPG

k-IMG_0688.JPG
 
The upper wing halves are now on the fuselage. Everything matches the drawing perfectly.

k-IMG_0689.JPG


The lower wing part with modified openings. Here I deviated from the drawing, where the openings are at the same height while the 20mm cannons are shown offset. I could imagine that there would be problems with the cannon if a opening is not where it´s needed.

k-IMG_0690.JPG
 
Something progressed. I took the tail unit from a Revell P-47. There was enough material to work out the correct shape. I'm still making the transition to the fuselage.

k-IMG_0693.JPG

k-IMG_0692.JPG

k-IMG_0695.JPG

And the wheel well is finally finished - of course I still have to work out the exact outline.. The 20mm cannons consist of 1.2mm and 0.9mm cannulas pushed into one another. To align them, I temporarily attached them with Uhu Tac and then fixed them with superglue.

k-IMG_0696.JPG
 
Thanks!
I'm at the tail right now. I thought I could carve things out like I did with the vertical tail. Wrong thought. Sawing, gluing strips and sanding was the order of the day. The tail unit is now ready for engraving.

k-IMG_0698.JPG

Unfortunately, the rest cannot be engraved yet because a crack has appeared on the back of the fuselage. While the superglue was drying, I worked on the hood. I couldn't find anything suitable in my leftover box, so I made a new one. This is roughly the outline I need:

k-IMG_0697.JPG

Gaps filled and roughly sanded:
k-IMG_0700.JPG

...and polished on the Vacu Box:

k-IMG_0701.JPG
 
Last edited:
I don't know exactly how I want to paint the plane yet. I started with a black primer and a coat of AK-Extreme Alu. With the AK-Extreme colors you can clearly see where areas still need to be touched up.
k-IMG_0711.JPG
Of course, the plane is not perfect enough for an aluminum finish. But to be honest, I imagined it would be worse. Aluminum is a good basis for other colors.
 
Nice, the aluminium undercoat will be useful for any weathering effects later.
 
Quickly filled and sanded again. I couldn't leave the surfaces like that. I used Revell Color Aqua 16 for filling.
k-IMG_0715.JPG

This paint is almost dried out and is very thick. It is easy to apply with a brush, dries quickly and can be sanded much finer than any filler. Guess I need to check some of the engravings again :D:D
 
I prefer not to show the second aluminum paintwork at this point. It just looked a little better than before. At least I was able to clean up the worst of the scratches. I like to show the 3rd layer of paint. Boring standard Swedish camouflage with makeshift maneuver stripes:
k-IMG_0716.JPG
 
Back
Top Bottom